How To Install Shelf In Kitchen Cabinet : Kitchen pantry cabinet pull out shelf storage sliding shelves / Of space on each side for the side cleats.. If we just did the sides, eventually they might sag in the middle. Some can also mount to the inner left and right side walls of the cabinet. Narrow pull out pantry shelves. How to install place your pull out shelf into the cabinet that you are planning to install it in to make sure that it fits without any trouble. Use a level to ensure your cabinets are installed accurately.
Hold these wood braces flat against the walls of the cabinet so that the top edge of the lumber follows the lines. A ledger is a board that helps support the cabinetry as you work. Then, check the dimensions of cabinet organizer to make sure it will fit. Here's the space between the wall mounted cabinets. Position the corner cabinets 1/4 in.
Kitchen pantry cabinet pull out shelf storage sliding shelves from www.shelvesthatslide.com We started with a few scrap 1x2s cut to fit the shelf. Buy the materials you need, prepare your cabinets, and then line your shelves to add a nice little touch to your kitchen. Before you start building this under sink pull out storage system, first measure the width of your kitchen base cabinet inside the frame. If you want to do several layers of shelves, it is best to start with bottom sliding shelves and move to the middle or top only when you know you will have space for several racks. Hold these wood braces flat against the walls of the cabinet so that the top edge of the lumber follows the lines. Next, hold the shelf just outside of the cabinet and level with the drawer slides. Place the corner cabinet into position on the wall stud marking. Do not sand very much on plywood.
If you do, you may sand through the top ply exposing the glue beneath it.
The cleats under the shelf are fillers to elevate the shelf just enough so the crown molding fits under the shelf and yet comfortably clears the doors below. Position the corner cabinets 1/4 in. This will support the weight evenly. There is not much to sizing a standard rectangle shelf. Use a level to be sure that the cabinet is straight. Place the corner cabinet into position on the wall stud marking. 4 remove the shelves from the packaging. If we just did the sides, eventually they might sag in the middle. Away from the vertical positioning lines. You want the liner to cover the entire surface with no big gaps at the edges. Hold these wood braces flat against the walls of the cabinet so that the top edge of the lumber follows the lines. The side cleats will overhang on the cabinet side. Most will simply mount to the base of the cabinet floor with screws on the front and back of the pull down.
Screws through the back into the wall studs to anchor it. Use a table saw to make this cut, leaving enough extra on the outside edges of the board to make up for material that will be lost from planing the edges. There is not much to sizing a standard rectangle shelf. Get detailed instructions on installing wall cabinets in any room, here: If needed, insert a shim to make it level and flat to the wall.
7 Ways to Upgrade Your Kitchen Cabinets Without Replacing Them - Reliable Remodeler from d3nslrukb9lhwg.cloudfront.net A ledger is a board that helps support the cabinetry as you work. For a regular kitchen cabinet a 3/4 extension slides puts items that are in the back of the cabinet with the shelf closed, up to where the front items were after the shelf is extended. Next, hold the shelf just outside of the cabinet and level with the drawer slides. If you need a refresher on how to take accurate measurements, watch our video on how to use a tape measure. Push the drawer slides closed. Place a level on the base of the shelf to make sure it sits level. Carefully but firmly push the shelf all the way into the cabinet. Brand new and great video!!!:
Order the sliding shelves that fit your cabinets.
In other words 3/4 extension slides make the back of your kitchen cabinet accessible. Screws through the back into the wall studs to anchor it. Get detailed instructions on installing wall cabinets in any room, here: We started with a few scrap 1x2s cut to fit the shelf. 4 remove the shelves from the packaging. You want the liner to cover the entire surface with no big gaps at the edges. Learn how to design, build and install your own pull out shelves in this instructional episode of dp shop talk. The cleats under the shelf are fillers to elevate the shelf just enough so the crown molding fits under the shelf and yet comfortably clears the doors below. The quiktray rollout system is available online from quickdrawers.com. Here's the space between the wall mounted cabinets. Drill the holes and set the corner cabinet in place. The line on the floor is your secondary guide. There is not much to sizing a standard rectangle shelf.
The quiktray rollout system is available online from quickdrawers.com. Using a level, we then screwed them to the cabinet sides and wall. Nail cleats to the tops of the cabinets to elevate the shelf. If you want to do several layers of shelves, it is best to start with bottom sliding shelves and move to the middle or top only when you know you will have space for several racks. Drill the holes and set the corner cabinet in place.
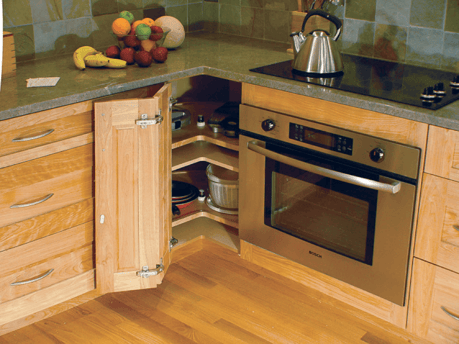
Kitchen Cabinets: Blind Corner Cabinet Solutions from www.baycitiesconstruction.com Here's the space between the wall mounted cabinets. Using a level, we then screwed them to the cabinet sides and wall. The side cleats will overhang on the cabinet side. Carefully but firmly push the shelf all the way into the cabinet. Learn how to design, build and install your own pull out shelves in this instructional episode of dp shop talk. Place a level on the base of the shelf to make sure it sits level. Place the corner cabinet into position on the wall stud marking. We started with a few scrap 1x2s cut to fit the shelf.
If you want to do several layers of shelves, it is best to start with bottom sliding shelves and move to the middle or top only when you know you will have space for several racks.
Do not sand very much on plywood. Hanging upper kitchen cabinets is the next step in this series. In other words 3/4 extension slides make the back of your kitchen cabinet accessible. If needed, insert a shim to make it level and flat to the wall. Most will simply mount to the base of the cabinet floor with screws on the front and back of the pull down. If you do, you may sand through the top ply exposing the glue beneath it. This will support the weight evenly. Place a level on the base of the shelf to make sure it sits level. Use a level to be sure that the cabinet is straight. Of space on each side for the side cleats. The cleats under the shelf are fillers to elevate the shelf just enough so the crown molding fits under the shelf and yet comfortably clears the doors below. Pull down shelves mount on the inside of the cabinet. Cut the base (a) 1/4 in.